


[[post.title]]
BMW AMP UPGRADE | Now compatible with 97% of BMWs!
BMW AMP UPGRADE | Now compatible with 97% of BMWs!
BMW Original Parts
Search by VIN
Search by VIN
Oct 19, 2020
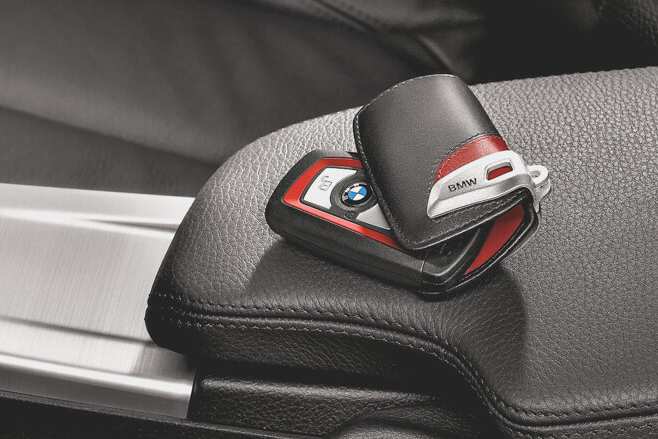
Getting a new set of keys for your BMW used to be pretty simple. Just take your key to the watch / jewelry / shoe / etc. repair guy down the street who also happened to offer while-you-wait key cutting, and get a whole bunch made.
Modern remote keys have plenty of security benefits and make it easy to get into your car and hit the road — particularly if your BMW or MINI has the Comfort Access feature. But for all this convenience, they can be a real pain to get copies of.
Maybe you want a spare in case you lose your primary key, or perhaps you share your BMW with a few family members and want everybody to have a key of their own. Maybe your existing key is just damaged, and you need something fresh.
Whatever your situation, BimmerTech’s here for you with some possible solutions. Ready to try them out?
Before shelling out on a new remote key fob, it's worth making sure your existing one really needs replacing. If it's not working, it could just be that the battery has run out.
If you've got a key fob that you have to insert in a slot on your BMW's steering column, you might be able to skip this step. Many of these fobs have rechargeable batteries designed to be topped up automatically during use; as soon as it's put in the ignition slot, it starts charging.
If you've got a more recent fob, though, you will likely have a non-rechargeable CR 2450 battery, which will need replacing periodically. It's a simple DIY job that only requires popping off your fob's rear panel and switching out the coin cell battery.
Depending on your vehicle and usage, a battery should last anywhere from one to three years before needing to be replaced.
If you've tried replacing the battery and your key fob still isn't working, or if you've lost your fob entirely, it's time to get a new one.
Since 2023, all new BMW and MINI key fobs can only be purchased at the official dealerships. They are made-to-order originals and will look exactly like the one you got from the factory. This means they are delivered pre-programmed for your specific vehicle, to ensure complete compatibility.
You won't have to worry about trying to get to grips with your vehicle's immobilizer, EWS, or CAS system. In the offer, there are also multifunctional OEM touchscreen key fobs for the latest G Series BMWs to replace your existing key fob.
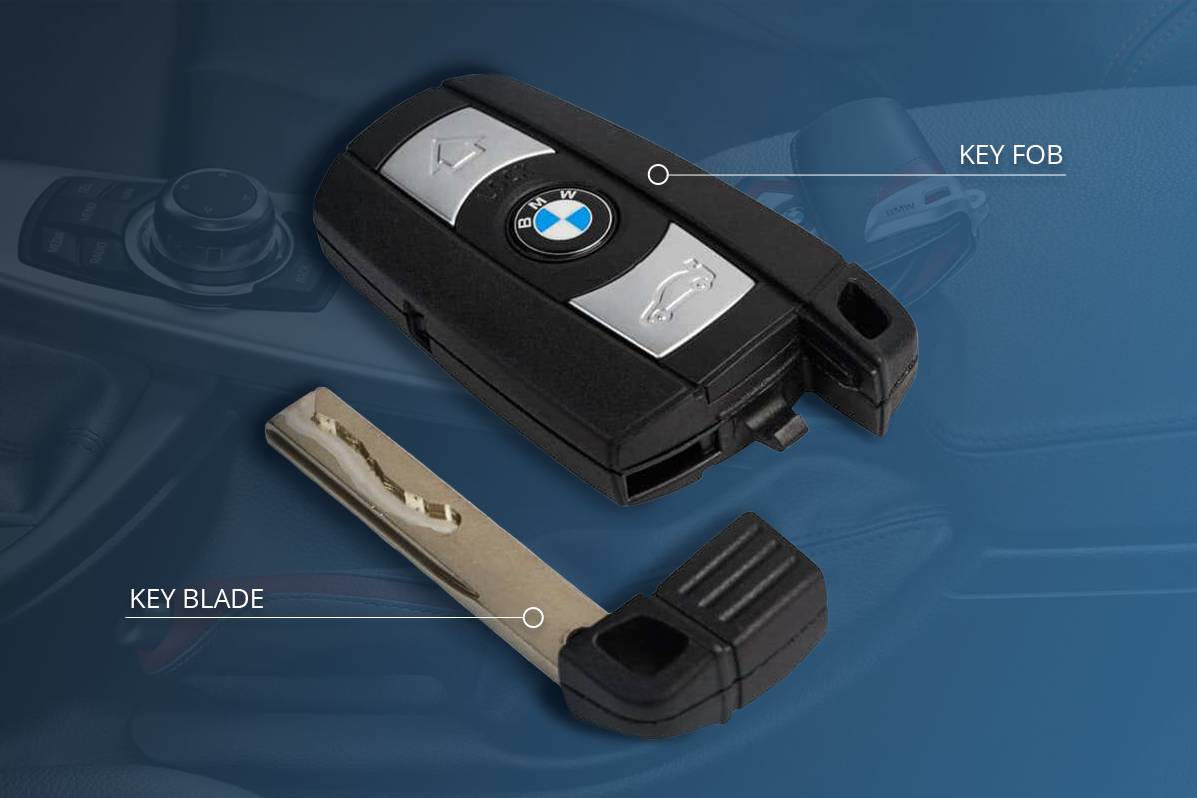
As standard, the replacement keys do not include the internal key blade—the traditional key that slides out of the base of the fob—which can easily be switched over from your existing key fob. If you're looking for a spare rather than a replacement, you're going to need an internal key blade, which can be added when placing the order. Without it, you'll likely be unable to access your vehicle the next time your fob's battery runs flat.
Your key will come pre-programmed for your vehicle, but will still need to be activated before use.
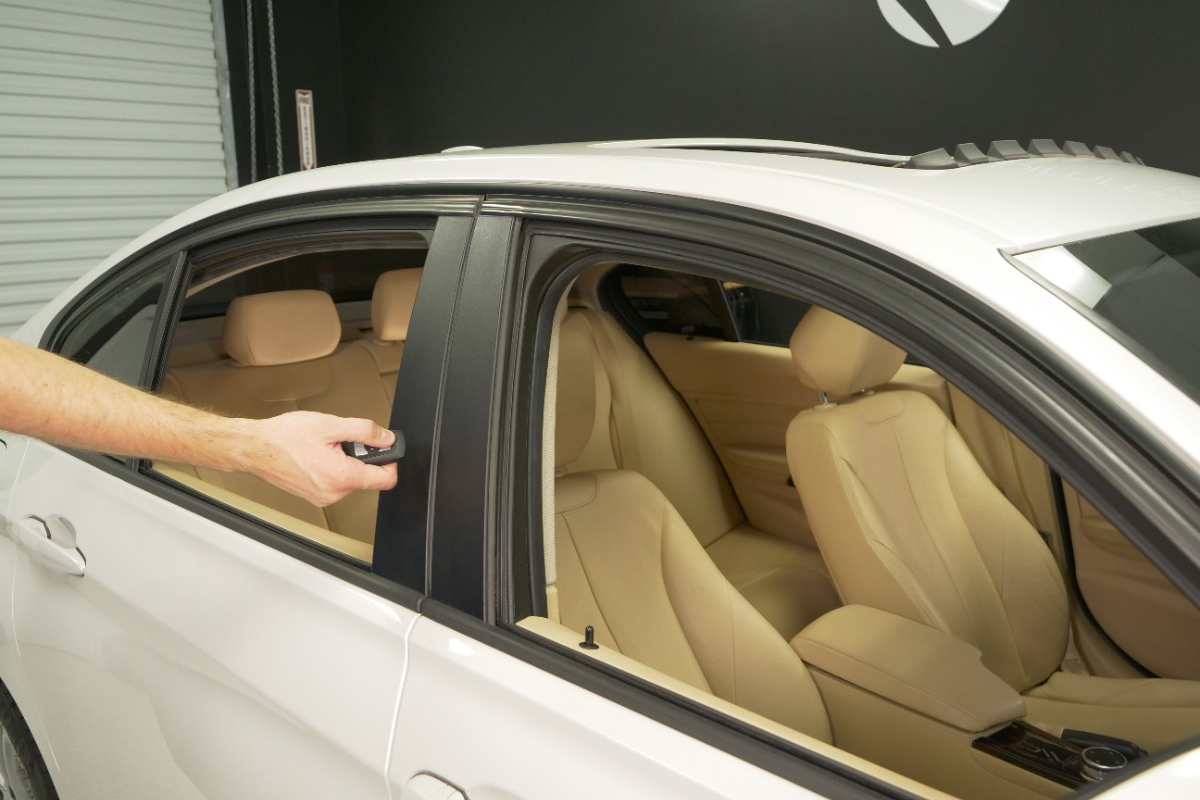
To do so, hold your new key fob flat against the low key battery indicator on the side of the steering column. Then hold the start/stop button until the 'no key' warning light disappears. Press the start/stop button again to confirm activation was successful.
If this doesn't work, you may need to take your existing key fob out of signal range when activating your new key, to prevent interference. To do this, unlock your BMW with the existing key, then have somebody take it a reasonable distance from your vehicle. You can then place your new key against the steering column and press the start/stop button.
To activate your new remote key in MINIs produced since July 2004, there's a simple process.
With all the doors closed, turn the ignition switch to KL-R (the first position), switch off within five seconds and remove the key.
Within 30 seconds, press and hold the unlock button, then whilst holding it, press the lock button three times within 10 seconds.
Then release both buttons and turn the ignition to KL-R to complete the initialization.
In E Series BMWs and MINIs with the Comfort Access feature, key fobs activated as described above will only unlock your vehicle when used manually, and cannot be used with the Comfort Access feature.
To activate your new key fob for use with Comfort Access, it is necessary to code your vehicle to delete the existing key profile and set the new key for use with Comfort Access. This can be done at your local BMW/MINI dealership, or we are able to code this for you remotely.
Those of you who bought a used car are most likely familiar with the discomfort of not knowing what exactly has happened to your car or how many active key fobs for it could still be floating around. This particularly applies to spare key fobs that might remain in the possession of the vehicle's previous owner or owners.
So, to give you a clear overview of your key fobs’ activity status, we offer a key fob decoding service. Which simply means, we can determine how many keys were added to your BMW and how many of them are currently enabled or disabled. It may well be that you could benefit from deactivating some of them to sleep better at night — in this case our technicians will take care of it in no time.
If you lose a key and worry that it will fall into wrong hands you can also use the service of a key fob deactivation - it will block the key fob in the memory of the car and make it useless.
The above activation methods assume you have a new key fob ordered from an authorized BMW dealer or third-party reseller, which was made specifically for your vehicle based on its VIN. These methods will not work with a used key fob, or one intended for use with another vehicle. The majority of key fobs available for sale through online marketplaces such as eBay fall into this category.
To improve vehicle security, your BMW's head unit will only allow activating fobs with one of a predefined list of identifying keys. This list of approved fobs is unique to each vehicle, preventing criminals from pairing other key fobs with your vehicle to gain illegitimate access to it. Reprogramming your vehicle or a used key fob to allow the two to be paired would require overriding key parts of your BMW's anti-theft system, potentially compromising its security.
Like BMW, we recommend only attempting to use key fobs ordered from a BMW dealership or a reputable third-party reseller.
A new BMW key fob isn't just a good idea when you've just lost a key fob; it can also be worth adding an extra fob to your collection if your family members share your car. Getting a new fob is also a good opportunity to take another look at a few of the BMW key fob features you might have missed, particularly if you're buying for a used car.
If you share your BMW with colleagues or family members, chances are you won't all have the same preferences behind the wheel. Adjusting the steering wheel and seat position every time somebody new gets in the car can be a hassle, but it's one that an extra key fob can solve.
Each BMW key fob can be associated with a different driver profile, which includes saved presets. Unlock your vehicle with the key fob associated with a specific driver profile and the seat will automatically slide into your preferred position. When another driver unlocks the car, the seat will slide back to a previous position.
Besides just locking and unlocking your BMW, your BMW can also perform additional functions remotely, including controlling the windows and sunroof or folding the wing mirrors. Window control is ideal on hot days when you want to air out your car, or for ensuring your car's windows are all shut firmly when locking your car. Automatically folding in your wing mirrors when locking your car also helps reduce the risk of damage from passing vehicles.
Both features only require pressing and holding the lock/unlock button on your remote fob. Availability of this feature may vary depending on your vehicle and country, but can be activated in a remote coding session with a skilled BimmerTech technician. Doing so adds an extra layer of convenience to your new remote key fob.
Want to know more hidden BMW key fob features? Read our blog.
Something that also might replace your BMW key fob in the near future, and in fact key fobs of all major vehicle brands, is a Digital Key installed on your mobile device. This feature, enabled thanks to NFC technology, will connect an iPhone to your BMW and give you a possibility to unlock and drive your car with only a few taps on your phone. Additionally, you’ll be able to use the rather unconventional option of CarKey sharing — it allows the car owner to share their Digital Key with up to 5 drivers and place limitations on car settings, like top speed, accessible power or music volume.
The official launch of Apple’s Digital Key is to start with the 2021 5 Series BMW, but in fact pretty much any BMW produced since July 2020 will be able to support this technology.
![]() Customer Reviews
Customer Reviews
Comments
Rate the product
This email is already registered.
Please Log In to continue.
![]() Customer Reviews
Customer Reviews
Comments
Rate the product
This email is already registered.
Please Log In to continue.
[[comment.name]]
[[comment.text|raw]]
BimmerTech
Newsletter
[[comment.name]]
[[comment.text|raw]]
BimmerTech